Creating a Room (Sheet Set)
Rooms (Sheet Sets) are created from the VidCAD Main Menu. The instructions below will guide you through creating and starting a new Room.
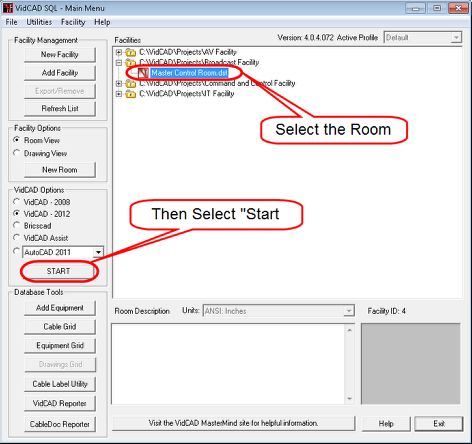
1. Select the facility you wish to create a new room in, change the Facility Option radio button to “Room View,” then select “New Room.”

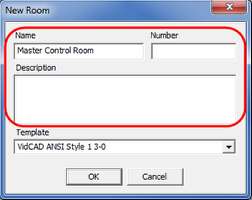
2. In the New Room window enter your facilities room name and description.
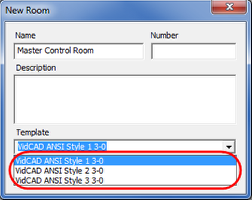
3. Select the flyout arrow on the right side of the Template field to choose a sheet set style.
Note: the list in your New Room window will vary slightly from the one below.
Note: The style of page is determined by the default on the .dst (sheet set template) you select.
4. Select “OK” to complete your New Room creation and return to the VidCAD Main Menu. If the Room View radio button is selected in the Facility Options area of the VidCAD Main Menu, you will see the room you created under the Facility name.
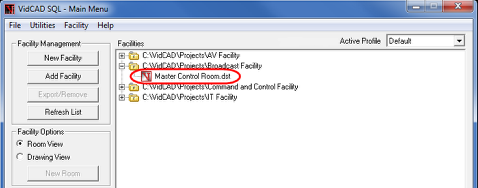
5. Highlight the Room you just created (.dst file) and click “Start.”
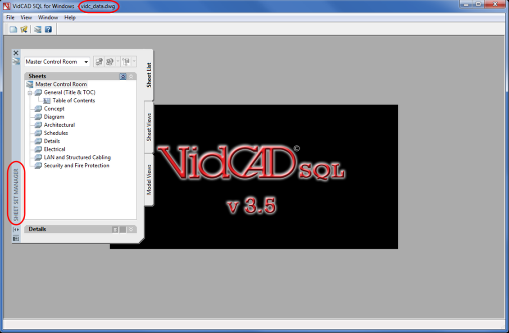
6. A vidc_data drawing is opened with a new sheet set manager (Room).
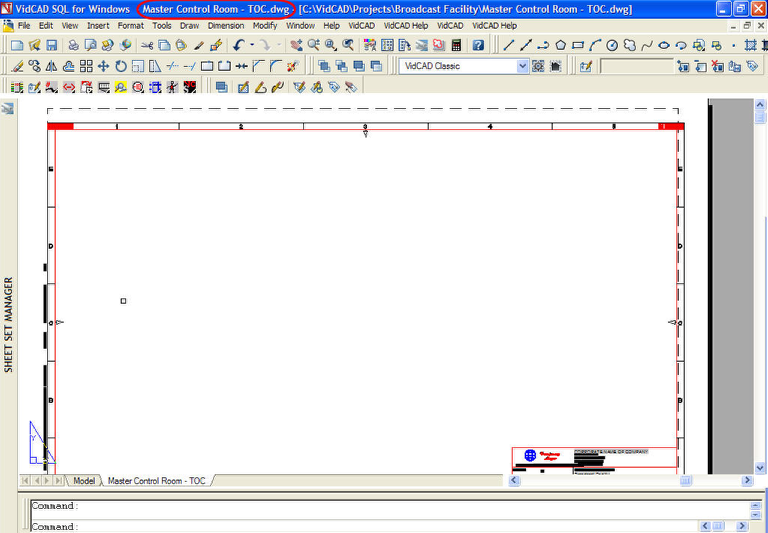
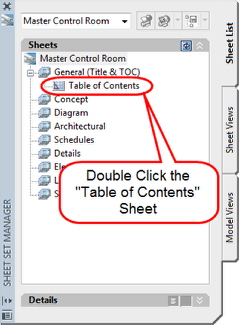
7. In the sheet set, double click on “Table of Contents” near the top of the list. When the drawing is loaded, select “Save” to save the drawing.
8. The Table of Contents diagram drawing is opened with the name of the sheet set (Master Control Room) as the plotting tab name and a drawing with the same name listed on the main menu.