Creating 2D Rack Elevation Drawings using New Drawing
Creating a New 2D Rack Drawing (Non Sheet Set Users)
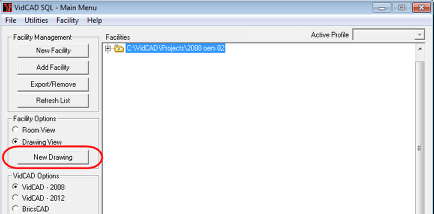
Another way to create new 2D rack drawing is from the New Drawing button on the VidCAD Main Menu. To do this, you must have the VidCAD Main Menu open in Drawing View. This excersice assumes you have the VidCAD Main Menu open and have already created a facility.
1. Select "Drawing View" from the Facility Options area of the VidCAD Main Menu.
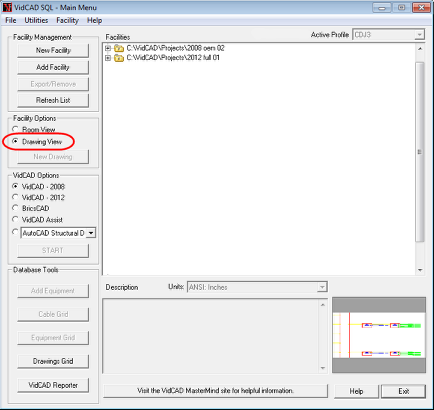
2. Select a facility then select "New Drawing."
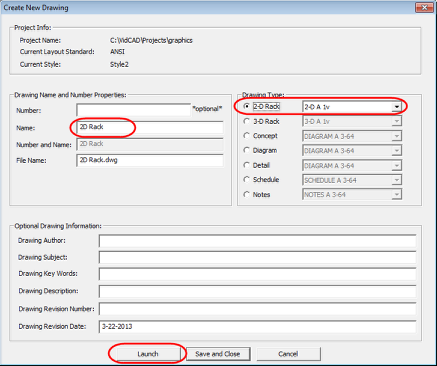
3. In the Create New Drawing window, enter the drawing Name and Number (optional), select "2D Rack" and choose a layout (paper) size in the Drawing Type section, and then select "Launch."
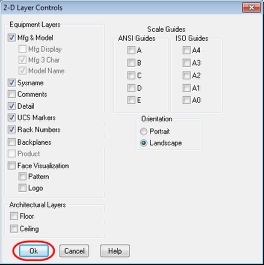
4. Select “Ok” in the 2D Layer Controls window to finish opening the drawing.
You are now ready to begin creating your 2D drawing.
Notice that there are some differences between 3D and 2D rack drawings. In 3D rack drawings, there are typically multiple viewports defined in both model space and paper space, so you can view rack layouts and floorplans from multiple three dimensional angles (SW, NW, Top, Front, etc). In 2D rack drawings, both model space and paper space are only viewed from one perspective, Front. There are various options in VidCAD for viewing the side and rear views of a rack, but the viewport is always in a Front orientation.