2D Racks - Creating a New 2D Rack From Scratch
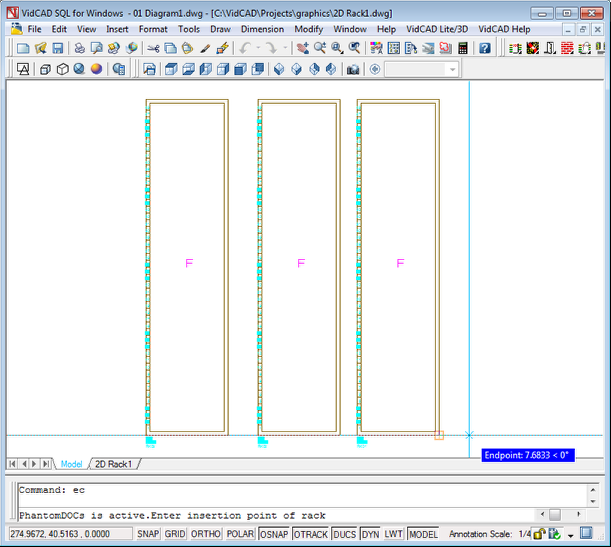
VidCAD has automated and simplified the design process to enable you to build two-dimensional front view of racks. You can easily create any new rack that is not already in the database by simply entering information about the model and its' dimensions. Using the Equipment Create command, the following procedure will guide you through creating a new rack in the database and placing it into a 2D drawing. This excercise assumes you have already created and opened a 2D Rack drawing.
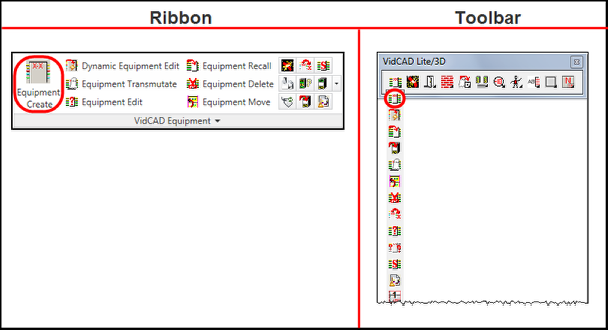
1. Select "Equipment Create" from the VidCAD Equipment ribbon or toolbar.
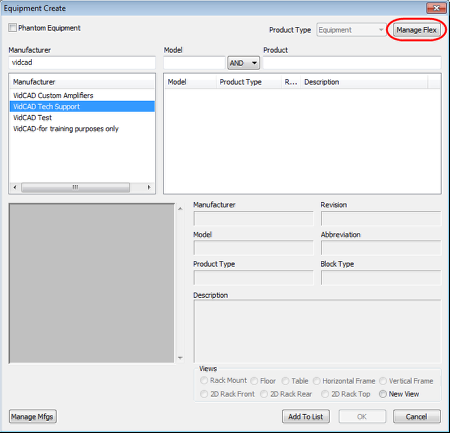
2. From the Equipment Create window, select the manufacturer for the new rack, and then "Manage Flex."
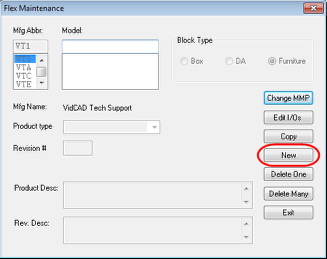
3. From the Flex Maintenance window, select "New."
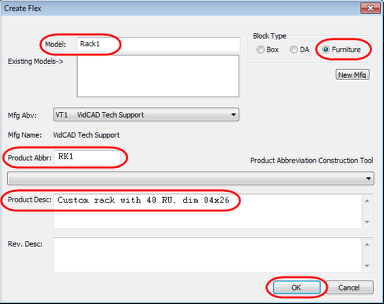
4. In the Create Flex window, select "Furniture" in the Block Type section, and enter information for the new rack in the Model, Product Abbr, and Product Desc fields. Then click "OK."
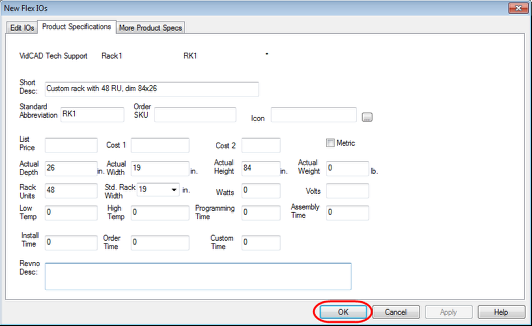
5. In the New Flex IOs window, enter values for the depth, width, height, and rack units in the, and then click "OK."
Note: Dimensions for furniture are entered using the same dialog that is used to create equipment blocks with inputs and outputs. When you select "Furniture" in the previous Create Flex window, it automatically skips the Edit IOs tab. You are not prevented from switching to the Edit IOs tab. However, if you add any inputs or outputs to a furniture block, it will automatically be created as a equipment - not furniture.
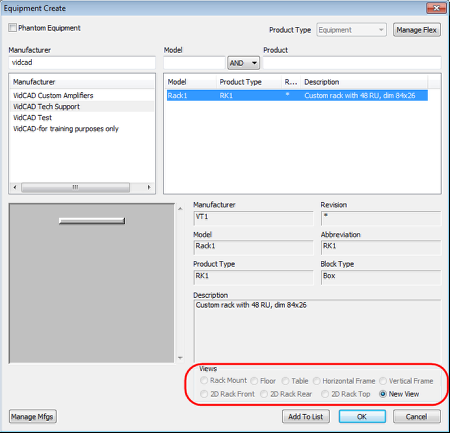
6. You are returned to the Equipment Create window. You are now ready to create a new 2D view for the new rack. Select the rack you just created, ensure New View is selected, and then select "OK."
Note: In the Views section at the bottom, there are currently no 2D views defined for this block, so only the New View option is available. You can also use the New View option to create more than one view or redefine an existing view for any equipment block or piece of furniture.
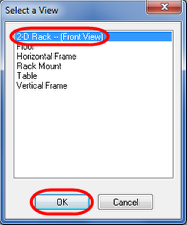
7. From the Select a View window, choose "2D Rack -- (Front View)."
Note: These views are exclusively used for rack creation and will automatically build a 2D rack to the specification entered earlier.
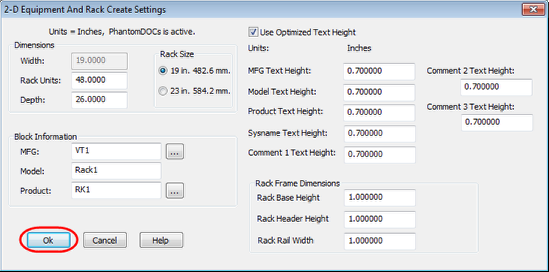
8. From the 2D Equipment And Rack Create Settings window, confirm the dimensions you have already entered or enter additional information. Select "OK" to place the rack in the drawing.
Note: You can select "Use Optimized Text Height" to edit the default text height. If you change the MFG, Model, or Product, from this dialog, a new model will be created with the view option selected in the previous window, and the original model will not be changed.
9. Pick an insertion point to place the rack into the drawing. You can continue to inserting racks, or press the ESC key to exit the command.
Note: Depending on your settings, you may be prompted to enter a sysname before placing the rack into the drawing.