Adding a Router to a Project Database
Prior to assigning a router connection, the router must be defined and added to your project database. The procedure below will guide you through adding a new router from the router area of the Phantom Cable Transmutate command.
1. Select “Phantom Cable Transmutate” from the VidCAD Cables ribbon or toolbar.
2. Select the Router image from the Phantom Cable Transmutate window box.
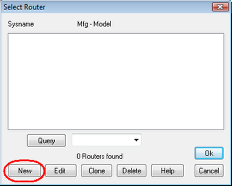
3. Select “New” in the Select Router window.
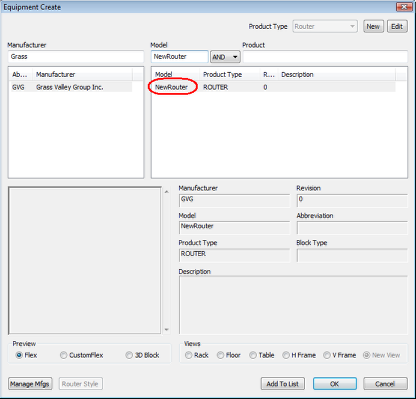
4. Locate and select the Manufacturer and Model of the router you wish to add.
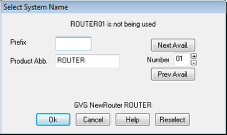
5. Change the Prefix, Product Abbreviation and Number fields that combine to make the Sysname for your router, then select “Ok.”
6. The router is now added to your project database.
Note: If you need to display a fixed equipment FlexiBLOCK as a router, you must define it in Manage Flex and use a Product Type other than “router” (such as “Matrix Router”), because the word “router” is reserved in the code for the router symbol type of equipment. When defining a router as a FlexiBLOCK, you can use the High/Low function to quickly display the highs and lows (starting and ending ports) of the router.