2D Racks - Recalling Project Equipment to a 2D Rack
Equipment can be added to a 2D rack using the Equipment Create or Equipment Recall commands. The following exercise will focus primarily on the Equipment Recall command to accomplish this, but does briefly cover Equipment Create (with the assumption that all equipment is added in real mode). This excercise also assumes you have already created and opened a 2D Rack drawing and placed 2D Racks in the drawing.
Now you are ready to insert equipment into the rack using various views you have inserted.
Using Equipment Recall to Add Equipment to 2D Racks
After completing one or more diagram drawings, your facility is most likely populated with a long list of equipment sysnames. You can use the Equipment Recall command to quickly recall items from your equipment list and place them in racks.
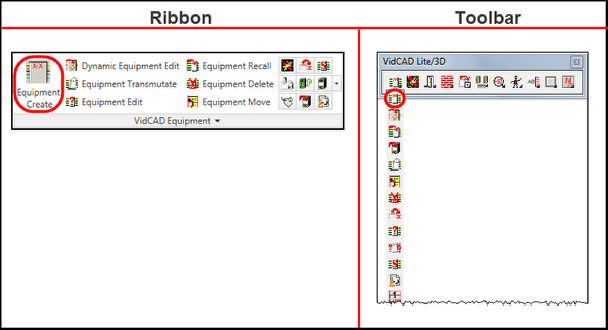
1. Select "Equipment Recall" from the VidCAD Equipment ribbon or toolbar
2. In the Equipment Recall window, select the sysname you want to place in the rack, and then select "OK."
Note: This exercise assumes you already have equipment in your database (most likely created in diagram drawings). If you do not, use Equipment Create instead of Equipment Recall to add equipment to the database.

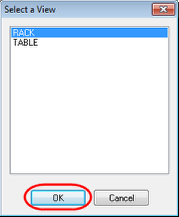
3. Select a view for the piece of equipment you are inserting into the rack, and then click "OK." If the equipment only has one view defined, it will automatically be selected, and this dialog will not appear.
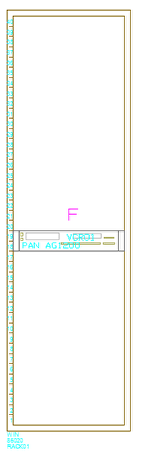
4. Select the "F" UCS marker on the front of the rack.
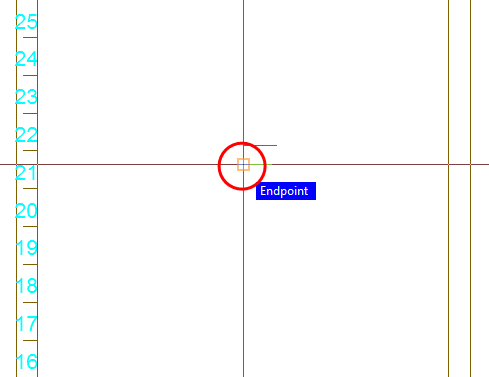
5. Select the postion on the rack where you want to insert the equipment.

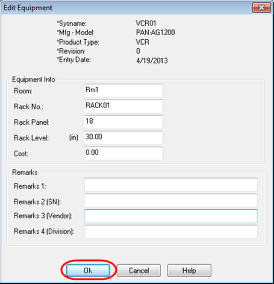
6. Click "OK" after reviewing the information in the Edit Equipment dialog.
Note: Any information, such as the room number, that was entered when inserting the rack will be inherited by the equipment. The rack sysname, position, and level are automatically filled in.
7. Continue adding equipment to the rack's front, rear, and top views as necessary using either Equipment Recall or Equipment Create.